Commercial Exterior Sealants: Weatherproofing Systems for Midwest Building Envelopes
Most water intrusion in commercial buildings doesn’t come through walls or roofs — it starts at joints, transitions, and openings. That makes exterior sealants one of the most critical, and most overlooked, components of the building envelope. Here’s what building owners and facility managers across the Midwest need to know.

Why Exterior Sealants Matter More Than Most Owners Realize
Up to 90% of water intrusion in commercial buildings occurs at joints, transitions, and openings — not in field areas. This is where sealants live, and where most envelope failures begin.
Think of a building envelope as a chain. Membranes and coatings handle broad-area waterproofing. Flashing directs water out at interruptions and terminations. Sealants bridge the gaps — at window perimeters, penetrations, and every material transition in between. Expansion joint systems absorb large-scale movement. When each component overlaps and ties into the next with compatible chemistry and adequate movement capacity, the system works. When one link fails, water finds a path in.
“Sealants are the flexible ‘connectors’ at gaps and transitions. Most leaks start at joints and openings, not field areas — so sealants are often the difference between a successful system and a recurring leak.”
— Dan Lephardt, Waterproofing & Building Envelope Specialist, RSI Milwaukee
The locations where commercial exterior sealants are most critical are also the locations most exposed to stress: window and curtainwall perimeters, precast panel joints, copings and parapets, roof-edge details, and expansion joints at traffic-bearing transitions. These are high-stress intersections where different materials meet, thermal movement concentrates, and water pressure is highest.
One important distinction for building owners: “water-resistant caulk” is not a commercial sealant. That consumer-grade term describes products that may shrink, crack, or debond quickly in dynamic joints. Commercial building envelope sealants are tested and rated systems — classified by movement capability, adhesion performance, UV resistance, and chemistry compatibility per ASTM C920 standards. Choosing a consumer-grade product for a commercial joint is one of the most common — and most expensive — mistakes building owners make.
Why Commercial Sealants Fail — Common Causes of Premature Failure
Here’s what most building owners don’t hear: the vast majority of sealant failures are selection and installation errors — not material defects. When a sealant debonds or cracks within a few years of installation, the root cause almost always traces back to one of these avoidable mistakes.
Selection & Design Errors
- Wrong joint geometry Missing backer rod or three-sided adhesion traps stress at the bond line instead of allowing the sealant to stretch and compress. Proper depth-to-width ratios are essential for movement accommodation.
- Mismatched chemistry Per ASTM C920, sealant movement classes range from ±12.5% to ±50%. Selecting a class that can’t handle the joint’s actual thermal movement, UV exposure, or chemical environment guarantees early failure.
- Undersized expansion joints Expansion joints are designed to move — but many are undersized, poorly installed, or “repaired” with rigid materials that can’t accommodate thermal cycling. The rigid repair becomes the tear point.
Installation & Prep Errors
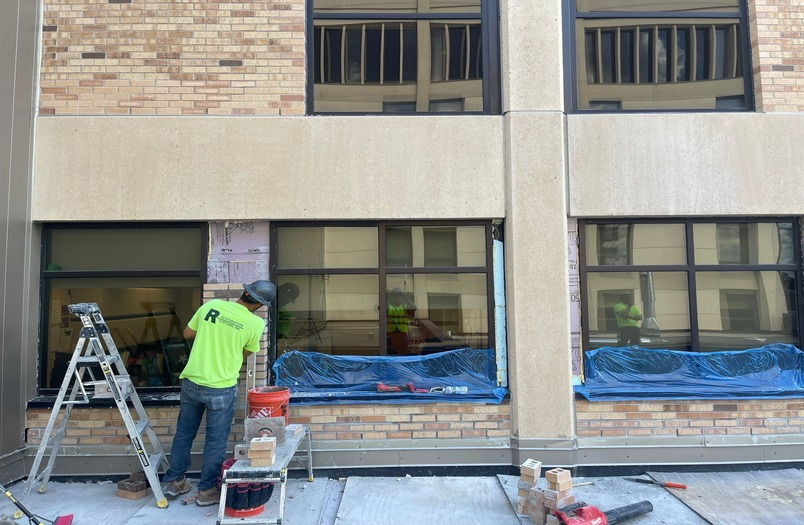
- Poor surface preparation Dust, moisture, and old sealant residue prevent adhesion. If the substrate isn’t clean, dry, and structurally sound, even a premium sealant will debond. Proper surface preparation is essential.
- Skipping primers Many substrate-sealant combinations require a primer for proper adhesion. Skipping this step saves minutes on the jobsite and costs years of service life.
- Temperature violations Installing sealants outside their rated temperature window compromises cure chemistry. Some products won’t bond at all; others cure improperly and become brittle within months.
- Incompatible adjacent materials Sealants that aren’t chemically compatible with adjacent membranes, coatings, or substrates can experience reactions that degrade adhesion over time — a hidden failure that only shows up after exposure.
“Early debonding → leaks → trapped water behind façade elements → staining, efflorescence, interior damage → accelerated freeze-thaw and corrosion at edges. Every failure in this chain started with a selection or installation shortcut.” — Dan Lephardt
How Midwest Climate Punishes Exterior Sealants
The upper Midwest is one of the harshest environments for building envelope sealants in the country. UV exposure, wide thermal swings, and relentless freeze-thaw cycling combine to fatigue joints faster than in any moderate climate. Here’s what your building faces every year.
Annual freeze-thaw cycles in the Minneapolis–Milwaukee corridor — each one stressing every joint
Annual range from -30°F to 100°F+ — meaning massive thermal expansion and contraction at every joint
Volume water gains when freezing — driving microcracking, scaling, and spalling that compounds every season
Typical sealant life reduction in harsh climates vs. moderate regions — demanding earlier replacement cycles
“Phasing often becomes essential: stop the water now, then execute permanent repairs in proper conditions. That’s not a compromise — it’s how quality work gets done in this climate.” — Dan Lephardt
Seasonality directly affects when and how sealant work can be performed in the upper Midwest. Most commercial sealants require minimum installation temperatures — typically 40°F and rising — along with specific humidity and cure conditions. Frost and condensation on substrates change prep requirements entirely. That’s why RSI often phases projects strategically: temporary leak mitigation protects the building through winter, followed by permanent sealant installation when conditions allow proper adhesion and cure. For building owners in Minneapolis, Milwaukee, and across the region, planning around these realities isn’t a limitation — it’s the difference between sealant work that lasts and sealant work that fails within two winters.
Sealant Types and Selection Criteria for Commercial Buildings
“We match each joint condition with a sealant designed to perform under those exact stresses — rather than relying on a one-size-fits-all product.” — Dan Lephardt
Sealant selection is science-based engineering, not “pick whatever’s on the truck.” On a recent university campus project along Lake Michigan — 30,000 linear feet of sealant replacement across multiple buildings — RSI deployed both polyurethane and silicone systems, selecting each based on substrate type, exposure conditions, and movement demands at every joint location. Material selection, surface preparation, and installation quality were critical to long-term performance at that scale.
The three main commercial sealant families each have distinct performance profiles. Understanding where each excels — and where it doesn’t — is the first step toward specifying the right product for every joint on your building.
| Sealant Type | Movement Capacity | UV Resistance | Best Applications | Cure Profile |
|---|---|---|---|---|
| Silicone | ±25–50% | Excellent | Curtainwall, glass-to-metal, window perimeters, high-UV exposure | Neutral cure (no byproduct) |
| Polyurethane | ±12.5–25% | Good (may yellow over time) | Concrete & masonry joints, precast panels, pedestrian traffic areas | Moisture cure |
| Hybrid / Modified Silicone | ±25% (typical) | Good | Multi-substrate transitions, versatile applications, mixed assemblies | Fast cure (paintable) |
RSI’s 5-Point Evaluation Framework
Before specifying a sealant for any project, RSI evaluates every joint condition against these five criteria — ensuring each product is matched to its specific demands rather than defaulting to a one-size-fits-all approach:
- Service conditions (immersion, UV, traffic, chemical exposure)
- Movement demands (±12.5% to ±50% per ASTM C920)
- Substrate type & surface prep limitations
- Cure profile & installation temperature constraints
- Compatibility with adjacent membranes & coatings
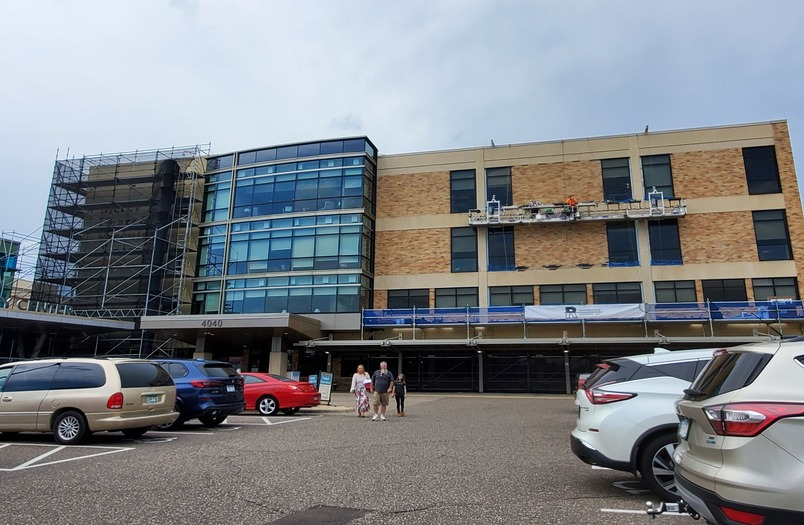
RSI Exterior Sealants in Action
These Minneapolis projects demonstrate how RSI approaches commercial sealant replacement as system-level work — not just re-caulking. Each required careful material selection, specialized access solutions, and coordination across multiple building systems.

Minneapolis, MN
720 Lofts — Sealant Replacement
Comprehensive sealant replacement across window perimeters, control joints, and transitions between dissimilar materials on a multi-story residential loft building. RSI deployed specialty “golden gate” boom rigging to navigate resident balconies without disruption, and selected different sealant chemistries matched to each joint condition — window perimeters, control joints, and dissimilar-material interfaces each required distinct products. Completed in 5 months (2024).
Proves the thesis: sealant replacement is system-level thinking — multiple joint types, each demanding the right chemistry, geometry, and installation approach.

Minneapolis, MN
US Bank Plaza — Twin Tower Sealant & Stone Restoration
A 5-year sealant replacement contract on a twin-tower complex (20 and 40 stories) integrating window perimeter sealants and stone joint sealants with stone repair, stone replacement, and roof flashing coordination. Each joint type demanded specific sealant chemistry matched to its substrate — stone, metal, and glass — and the movement demands of a high-rise envelope under constant thermal cycling.
Demonstrates that sealant work and stone repair are fully integrated — you can’t address one without the other on complex commercial facades.

What Owners Should Know Before Approving a Sealant Project
Before you approve your next sealant project, RSI’s Dan Lephardt recommends asking your contractor these six questions. The answers will tell you whether they’re solving the problem — or just masking it.
“What is the root cause — and how do we know?”
+If a contractor can’t explain the water pathway — how water is entering and where it’s traveling within the assembly — they’re guessing. Effective sealant repair starts with root-cause diagnostics: building history review, visual survey, moisture mapping, and targeted water testing at suspected transitions. Without this foundation, you’re paying to treat symptoms while the actual problem continues behind the façade.
“Is this a system repair or a patch?”
+Patches stop today’s leak. System repairs address why water is getting in — and prevent the next three leaks from developing. Both have a role, but you should know which one you’re approving. Ask whether the proposed scope addresses the full water pathway, including terminations, flashing continuity, and drainage, or just the visible symptom.
“How are terminations, transitions, and drainage being addressed?”
+These are where up to 90% of water intrusion starts. If terminations, transitions, and drainage details aren’t explicitly included in the scope, ask why. A proposal that only addresses field-area sealant replacement without detailing how these critical junctions are handled is leaving the highest-risk areas unresolved.
“What is the expected service life and maintenance plan?”
+Every sealant has a finite lifespan — and Midwest conditions can shorten it by up to 30%. A good contractor tells you upfront when you’ll need to revisit the work, what annual inspections should include, and how to budget for the next cycle. Thinking in lifecycle costs rather than patch-to-patch spending always saves money long term.
“What warranty is offered — and what voids it?”
+Warranties mean nothing if the exclusions cover the most likely failure scenarios. Ask specifically what conditions void the warranty — improper drainage, excessive building movement, lack of maintenance — and whether those conditions currently exist on your building. A transparent contractor will walk you through every detail before you sign.
“What access or open-ups are included to verify hidden conditions?”
+Surface-level repairs miss what’s happening behind the façade — trapped moisture, corroded anchors, deteriorated flashing. Proposals that include targeted exploratory probes and open-ups demonstrate a contractor committed to understanding the full picture before locking in a repair strategy. Budget for investigations, not just repairs.
Dan’s Proactive Advice for Property Managers
- Address small leaks early — they’re far cheaper to fix than the structural damage they cause
- Budget for investigations, not just repairs — root-cause diagnostics prevent repeat spending
- Inspect sealants, joints, and drainage annually — catch failures before they cascade
- Ask contractors how water moves through the assembly — not just where it leaks
- Think in lifecycle costs, not patch-to-patch spending — proactive maintenance always wins
Protect Your Building Envelope — Talk to RSI
Whether you’re dealing with active leaks or planning proactive maintenance, RSI’s building envelope specialists diagnose root causes and deliver sealant systems engineered for Midwest conditions. Our principals average more than 25 years’ experience each — and every project starts with understanding how water moves through your building.