The Complete Guide to Tuckpointing Costs: What Commercial Building Owners Should Expect
Understanding what you’re actually paying for—and why tuckpointing cost varies so dramatically between projects—can save your building thousands and prevent costly callbacks.

- Commercial tuckpointing costs range from $5-$25+ per square foot—but that range depends heavily on your specific building conditions.
- Access costs can represent 15-25% of your total project budget for high-rise buildings requiring swing stages or scaffolding.
- Quality tuckpointing requires removing mortar to 2x the joint width—anything less is “skimming” and won’t last.
- Deferred maintenance increases costs 5-10x when small mortar issues become major structural problems.
- Minnesota’s 80-100+ freeze-thaw cycles annually accelerate masonry deterioration faster than most climates.
- Always ask contractors about repair depth—the cheapest bid often means paying twice when repairs fail within 2-3 years.
What Is Tuckpointing and Why Does Your Building Need It?
If you manage or own a commercial building with masonry walls, you’ve likely heard the term “tuckpointing” mentioned during inspections or maintenance discussions. But what exactly is it, and why does it matter so much for your building’s long-term health?
Tuckpointing—also called repointing—is the process of removing deteriorated mortar from the joints between bricks or stone and replacing it with fresh mortar. Understanding how mortar joints fail helps explain why this maintenance is so critical. While it might seem like a cosmetic repair, it’s actually one of the most critical maintenance tasks for any masonry structure.
“Mortar is essentially the glue of the exterior masonry. When it fails, water enters and masonry deterioration accelerates.”— Dylan Reynolds, Project Manager, RSI
Think of mortar joints as the first line of defense against moisture intrusion. When those joints crack, crumble, or erode, water finds its way into your building envelope—and that’s when small maintenance issues become expensive structural problems.
5 Warning Signs Your Building Needs Tuckpointing
How do you know when it’s time to address your mortar joints? As Dylan Reynolds explains, “Owners and property managers can notice issues with mortar joints through cracking of the joints, crumbling mortar, water stains, or small pieces falling from the facade.” Here are the key indicators to watch for:
Cracking Mortar Joints
Vertical or horizontal cracks running through the mortar indicate the material is failing. Even hairline cracks allow moisture infiltration, which accelerates deterioration through freeze-thaw cycles.
Crumbling or Sandy Mortar
If you can easily scrape away mortar with your fingernail or see sandy material accumulating at the base of walls, the mortar has lost its binding properties and structural integrity.
Water Stains on Interior Walls
Discoloration or efflorescence (white salt deposits) on interior masonry walls often indicates water is penetrating through deteriorated mortar joints from the exterior.
Falling Mortar Pieces
Small chunks of mortar on sidewalks or windowsills below your facade are a clear sign of advanced deterioration that requires immediate attention before it progresses to brick damage.
Visible Gaps Between Bricks
Open joints where mortar has completely fallen away create direct pathways for water intrusion and can compromise the structural connection between masonry units.
Understanding Tuckpointing Cost: Why Every Project Is Different
Let’s address the question you’re really here to answer: How much does commercial tuckpointing cost? The honest answer is that tuckpointing price varies dramatically—and any contractor who gives you a single number without evaluating your building isn’t doing their job.
Industry-wide, commercial tuckpointing costs typically range from $5 to $25+ per square foot. That’s a wide range, and here’s why:
“The cost of a tuckpointing project is extremely variable. It’s highly dependent on building height, access methods, extent of deterioration, and any hidden conditions like corroded steel that need to be addressed beyond the mortar repair itself.”
— Dylan Reynolds, Project Manager, RSI
This variability isn’t a dodge—it reflects the reality of commercial masonry work. A two-story office building with minor joint erosion is a completely different project than a 15-story historic building with extensive deterioration and embedded steel lintels.
The key to getting an accurate estimate—and understanding why one contractor’s tuckpointing cost per square foot differs from another’s—is understanding the four major factors that drive pricing. Let’s break each one down so you know exactly what questions to ask.
The Four Major Cost Drivers in Commercial Tuckpointing
Building Height
Walls under 8 feet typically cost $5-$10 per square foot. Once you exceed single-story heights, costs increase to $10-$25+ per square foot due to access equipment requirements. High-rise tuckpointing requires specialized rigging, trained operators, and additional safety protocols—all of which add to your project cost.
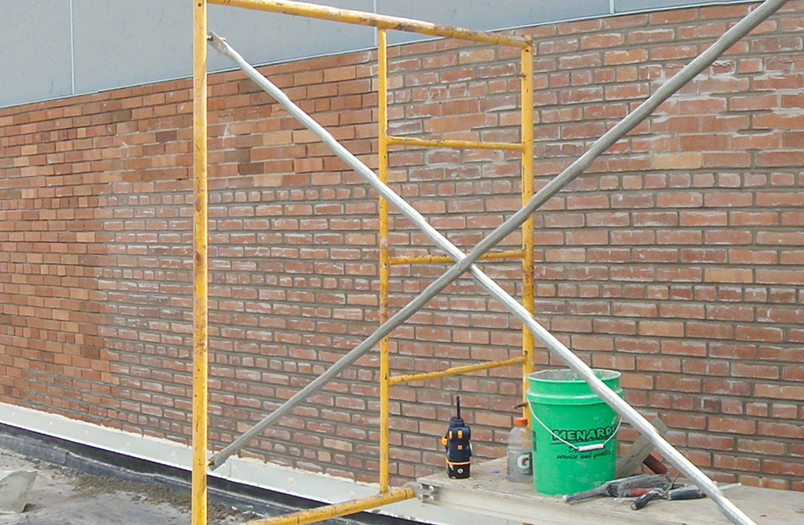
Access Methods
This is the factor that catches most property managers off guard. Swing stages, scaffolding, boom lifts, and mast climbers each come with different costs, setup times, and site requirements. Your building’s configuration, surrounding structures, and available staging areas all impact which access methods are feasible.
Up to 20% of project costExtent of Deterioration
A building with 20% of joints needing repair is a different project than one with 80% deterioration. Beyond the square footage involved, the depth of deterioration matters—shallow erosion is quicker to address than joints that have failed down to the backup wall. Comprehensive condition assessments prevent costly surprises mid-project.
Hidden Conditions
Corroded steel lintels, rust-jacking damage, and deteriorated backup walls often aren’t visible until work begins. These conditions must be addressed before tuckpointing can proceed—you can’t just apply new mortar over compromised structural elements. In some cases, commercial brick restoration may be required beyond tuckpointing alone. Experienced contractors factor contingencies for hidden conditions into their proposals.
Access Costs: The Budget Line Item That Surprises Property Managers
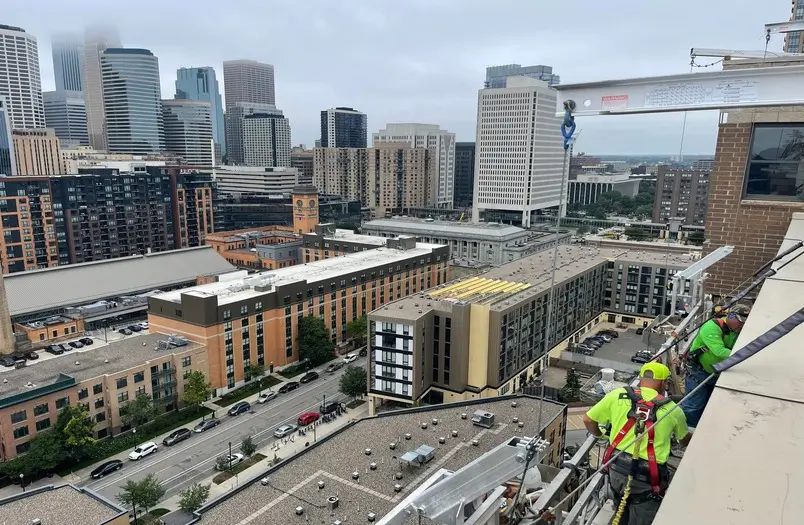
Of all the factors that affect commercial tuckpointing cost, access requirements consistently catch building owners off guard—especially those facing their first facade inspection.
Dylan Reynolds sees this regularly in his work with property managers: “One of the biggest things that catches property managers off guard with these local inspections is the access requirements that are needed in order to complete the facade inspections. So in order for an engineer to access the exterior of these high-rise buildings, they need swing stages installed on the building—a very large portion, sometimes up to 20% of a project’s cost, can be just access.”
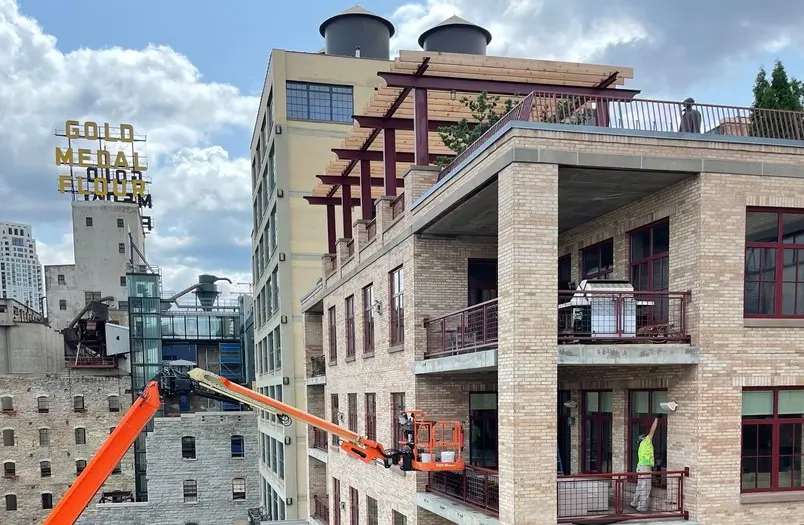
Why Access Is So Expensive
Swing stages require rigging points on your roof, trained operators, and detailed safety planning. Scaffolding needs engineering for anything beyond basic setups. Boom lifts require ground access and outrigger clearances. Each option has trade-offs between cost, setup time, and work efficiency.
The good news? Experienced contractors optimize access plans to maximize efficiency. By strategically sequencing work, combining access setups with inspections, and selecting the right equipment for your building configuration, you can minimize these costs while still getting comprehensive repairs.
Hidden Conditions: Why Your Estimate Might Change
Even with thorough pre-project inspections, some conditions only become apparent once deteriorated mortar is removed. As Dylan explains regarding what can drive costs beyond initial estimates: “That would be more hidden conditions, like corroded steel behind or embedded in mortar joints that are not visible on an exterior investigation.”
Here’s what experienced contractors look for—and what might be hiding in your building’s facade:
- Corroded steel lintels above windows and doors, where rust expansion (called “rust jacking”) has cracked surrounding masonry
- Deteriorated shelf angles that support masonry at floor lines in taller buildings
- Failed flashing that has allowed water infiltration behind the facade for years
- Backup wall damage where moisture has compromised the structural wall behind the veneer
- Previous improper repairs that masked underlying problems without addressing root causes
Reputable contractors will include contingency allowances in their proposals and communicate clearly about how change orders are handled. If a proposal promises exact pricing with no contingencies on a building that hasn’t been fully accessed, that’s a red flag—not a competitive advantage.
The goal isn’t to avoid hidden conditions—they’re often unavoidable in older buildings. The goal is working with a contractor who recognizes them when they appear, addresses them properly, and communicates transparently about cost implications.
Quality vs. Price: How to Evaluate Tuckpointing Bids
You’ve received multiple proposals for your building’s tuckpointing project. The prices vary significantly. How do you determine which represents genuine value versus which is cutting corners that will cost you more in the long run?
This is where understanding what actually constitutes quality tuckpointing becomes essential. Because here’s the reality: the most common way contractors reduce their price is by reducing the depth of mortar removal—and that directly impacts how long your repairs will last.
The single most important technical specification to look for in any tuckpointing proposal is the depth of mortar removal. This is the factor that separates lasting repairs from repairs that will fail in just a few years.
Property managers who understand this one technical detail have a significant advantage when evaluating bids. It gives you a concrete, measurable standard to compare proposals against—and a specific question that will quickly reveal whether a contractor knows their craft.
The 2x Joint Width Rule: The Key to Quality Tuckpointing
This is the single most important quality standard in tuckpointing—and the difference between repairs that last decades versus repairs that fail in 2-3 years.
Inadequate Repair Depth
Dylan Reynolds describes a practice that’s unfortunately common in the industry:
“Something we often see that’s improper, from maybe a non-specialized contractor, is called skimming of joints, where they’ll either not remove any mortar from the joints and just skim over it to hide it, or they will cut back a quarter of an inch, maybe one width of the joint. They’re not getting enough repair material in there to be successful.”
- Mortar removal: 0 to 1x joint width
- New mortar depth: Less than 3/8″
- Expected lifespan: 2-5 years before failure
- Appearance: May look acceptable initially
- Result: Thin mortar layer debonds and fails
2x Joint Width Minimum
Here’s the industry standard that quality contractors follow:
“The biggest and most important piece of tuckpointing is ensuring you’re getting the proper depth of repair. Our general rule of thumb is that we always cut and remove the old, deteriorated mortar to a depth of two times the width of the joint.”
- Mortar removal: 2x joint width minimum
- New mortar depth: 3/4″ to 1″ typical
- Expected lifespan: 25-30+ years
- Appearance: Consistent, professional finish
- Result: Full mechanical bond, lasting repair
“Property managers should be aware of what they’re reviewing in a bid or proposal from a contractor. Look for that technical detail—is the contractor cutting out at least two times the joint width? That’s the minimum for a proper tuckpointing application and a long-term successful repair.”— Dylan Reynolds, Project Manager, RSI
The True Cost of Cheap Tuckpointing
Choosing the lowest bid often means paying twice. Here’s what the data—and our experience—show about deferred maintenance and failed repairs.
“We often see repairs that were done two or three years ago, and we’re being called back to the site to fix them because the root cause was not addressed. We’ve been called out numerous times for projects where we originally submitted a proposal but weren’t the lowest price. In the end, the owner realized they paid someone to do it incorrectly the first time—and then had to pay us to come out and do it correctly.”— Dylan Reynolds, Project Manager, RSI
8 Questions to Ask Before Hiring a Tuckpointing Contractor
These questions will help you distinguish between contractors who understand quality masonry repair and those who are cutting corners to win on price. For Minneapolis-area projects, our guide to finding the right tuckpointing contractor in Minneapolis provides additional regional insights.
“What depth do you cut the mortar joints before repointing?”
This is the most important question. A quality contractor should immediately reference the 2x joint width standard without hesitation.
“What type of mortar will you use, and why?”
The answer should depend on your building. Historic buildings typically need Type O or K lime-based mortars; newer construction may use Type N or S. Generic answers are a red flag.
“How do you handle hidden conditions like corroded steel?”
Experienced contractors expect hidden conditions and include contingency planning in their proposals. Avoiding this topic suggests inexperience.
“Can you explain your access plan and associated costs?”
Access should be a detailed line item, not buried in overall pricing. Ask about equipment type, setup time, and how they’ll maximize efficiency.
“What’s your experience with buildings of similar height and construction?”
Commercial tuckpointing requires different expertise than residential work. Ask for references from comparable projects.
“What training do your crews have in masonry restoration?”
Union training programs and manufacturer certifications indicate investment in craft expertise. Ask about ongoing education.
“What warranty do you provide on your tuckpointing work?”
Warranties reflect confidence in workmanship. Compare warranty terms and what’s actually covered between proposals.
“How do you coordinate with building occupants and operations?”
Commercial projects require more than technical expertise—they need professional project management that minimizes disruption.
Midwest Tuckpointing: Why Our Climate Demands More
If you manage buildings in Minneapolis, St. Paul, or anywhere in the Upper Midwest, your masonry faces unique challenges that building owners in milder climates don’t have to consider. The freeze-thaw cycle isn’t just an inconvenience—it’s the primary driver of mortar deterioration in our region.
“It’s the nature of the climate here in the Midwest—the freeze-thaw cycle causes expansion as water infiltrates materials during warmer months. When that water freezes, it expands and causes cracks. Those cracks compound and lead to further water intrusion, which compounds through several freeze-thaw cycles until you have a completely unstable facade.”— Dylan Reynolds, Project Manager, RSI
This isn’t theoretical. Each year, Minneapolis experiences between 80 and 100+ freeze-thaw cycles—among the highest in the country. Every cycle where water enters a crack, freezes, expands, and thaws is another opportunity for that crack to grow. What starts as hairline mortar cracking can become significant structural deterioration within just a few seasons.
Historic Buildings and Mortar Selection: Getting It Right
Minneapolis has a rich architectural heritage—and much of it is built with materials that require specialized knowledge to repair properly. Using the wrong mortar type can actually accelerate damage to historic masonry.
The Chaska Brick Legacy
If your building is in downtown Minneapolis and dates from the late 1800s or early 1900s, there’s a good chance it was built with Chaska brick—a locally-produced brick that requires specific care when repointing.
“Many of the buildings in downtown Minneapolis were built with what’s called Chaska brick—it was actually made here in Chaska, Minnesota. These historic buildings were constructed with that old Chaska brick, which is a softer, kiln-cooled material. Most of these structures require low compressive strength mortar to avoid damaging the original masonry.”— Dylan Reynolds, Project Manager, RSI
Chaska brick, like many historic soft bricks, has lower compressive strength than modern brick. Using a hard, modern mortar creates a mismatch that transfers stress to the brick itself—causing spalling, cracking, and accelerated deterioration of your irreplaceable historic facade.

Understanding Mortar Types (ASTM C270)
Dylan explains how RSI approaches mortar selection: “RSI matches compressive strength and permeability to the existing masonry.” Here’s what that means in practice:
Type O Mortar
Lowest compressive strength. Ideal for historic buildings with soft brick like Chaska, limestone facades, and interior non-load-bearing walls. Allows moisture movement without damaging surrounding masonry.
Type N Mortar
“An extremely versatile medium strength mix that’s really good for general masonry, newer construction. It’s ideal for above grade exterior walls and tuckpointing that’s non-historic or non-limestone based.”
Type S Mortar
Higher compressive strength. “Typically used in structural load-bearing walls” where greater strength is required. Not appropriate for soft historic masonry.
The key principle: mortar should always be softer than the surrounding masonry. When repairs fail prematurely on historic buildings, incompatible mortar selection is often the cause. Our mortar selection guide explains this in greater detail.
Frequently Asked Questions About Tuckpointing Cost
Commercial tuckpointing typically costs $5-$25+ per square foot. Walls under 8 feet generally fall in the $5-$10 range, while multi-story buildings requiring scaffolding or swing stages cost $10-$25 or more. The wide range reflects differences in access requirements, deterioration extent, and hidden conditions specific to each building.
Taller buildings require specialized access equipment—swing stages, scaffolding, or boom lifts—which can represent 15-25% of total project costs. These systems require engineering, trained operators, safety planning, and setup time. High-rise tuckpointing also demands additional logistics coordination and may be subject to wind delays.
Quality tuckpointing performed to industry standards (mortar removed to 2x joint width, proper mortar selection) typically lasts 25-30+ years. However, “skimmed” repairs with inadequate mortar removal often fail within 2-5 years. Climate also matters—buildings in freeze-thaw climates like Minnesota may need attention sooner than those in milder regions.
The terms are often used interchangeably in the U.S. to describe removing and replacing deteriorated mortar in masonry joints. Technically, “tuckpointing” historically referred to a decorative technique using contrasting mortar colors, while “repointing” describes the repair process. In modern commercial use, both terms typically mean standard mortar joint repair.
Key warning signs include cracking or crumbling mortar joints, mortar that’s sandy or easily scraped away, water stains on interior walls near exterior masonry, mortar pieces falling from the facade, and visible gaps between bricks. If you notice any of these conditions, a professional facade inspection can determine the extent of deterioration.
Ask about their mortar removal depth (should be 2x joint width minimum), mortar type selection for your specific masonry, how they handle hidden conditions, access planning, crew training and certifications, warranty terms, and experience with similar building types. Their answers reveal whether they understand quality masonry restoration.
Traditional mortar requires temperatures above 40°F during application and curing. Tuckpointing in colder conditions requires cold-weather procedures including heated materials, enclosures, and specific mortar formulations. Some contractors avoid winter work entirely, while experienced crews can work through Minnesota winters with proper precautions.
Historic buildings typically require lime-based mortars like Type O or Type K, which have lower compressive strength and allow moisture movement. Using modern high-strength mortars (Type S) on soft historic brick can cause spalling and accelerate deterioration. Mortar should always be softer than the surrounding masonry units.
Low bids often reflect inadequate mortar removal depth (“skimming”), improper mortar selection, minimal contingency for hidden conditions, or inexperienced crews. Failed repairs cost more to fix than doing the job right initially—you pay for the original work, then pay again to have it corrected. Industry data shows deferred or failed maintenance costs 5-10x more long-term.
Access equipment typically represents 15-25% of total project cost for high-rise buildings. Swing stages require roof rigging points and certified operators. Scaffolding needs engineering for complex setups. Boom lifts require ground access and clearances. Experienced contractors optimize access plans to maximize efficiency and minimize this significant cost factor.
Ready to Discuss Your Building’s Tuckpointing Needs?
We work intimately with property management and ownership groups to develop repair plans based on your budget needs and constraints. Our tuckpointing and mortar repair services are designed to achieve the long-term health of your buildings and properties—within your budget. Our team specializes in achieving the long-term health of your buildings and properties—within your budget.