Commercial Tuckpointing & Mortar Repair
Expert mortar restoration for commercial buildings across Minneapolis, the Twin Cities, and the greater Midwest. We preserve structural integrity and extend building lifespan through precision tuckpointing that addresses root causes—not just symptoms.

Key Takeaways
- Tuckpointing is the process of removing deteriorated mortar and replacing it with new mortar to restore masonry integrity and prevent water infiltration.
- Proper depth matters: Mortar must be removed to a depth at least two times the joint width for a lasting bond—anything less leads to premature failure.
- Mortar selection is critical: Using the wrong mortar type can damage historic brick—especially soft Chaska brick common in Minnesota’s older buildings.
- Water is the enemy: Water expands 9% when frozen, creating the freeze-thaw cycles that crack mortar joints throughout Midwest winters.
- Quality tuckpointing lasts 25-30 years when done correctly—but improper work may fail within 5-10 years, costing you more in the long run.
What Is Commercial Tuckpointing?
Tuckpointing is a masonry repair process that involves removing deteriorated mortar from between bricks or stone and replacing it with fresh mortar to restore the wall’s structural integrity, weather resistance, and appearance.
The term “tuckpointing” is often used interchangeably with “repointing” in the Midwest, though technically they describe slightly different techniques. Repointing refers specifically to the process of removing and replacing mortar, while traditional tuckpointing involves creating the illusion of fine joints using contrasting mortar colors. In commercial applications, we use these terms to describe the same essential service: restoring mortar joints to their proper condition.
For commercial property managers and building owners, understanding tuckpointing is essential because mortar joints are designed to be the sacrificial element in a masonry system. Mortar is intentionally softer than brick, allowing it to absorb stress from building movement, thermal expansion, and moisture—protecting the more expensive and difficult-to-replace brick units.
When mortar deteriorates and is not properly addressed, water infiltration accelerates damage throughout the building envelope. This is why proactive tuckpointing is a critical component of any commercial building maintenance program.
Why Mortar Fails: Understanding the Root Causes
Mortar deterioration is inevitable—it’s designed to happen. But understanding why mortar fails helps property managers make informed decisions about when and how to address it. The primary culprit in the Midwest is our climate: the repeated freeze-thaw cycles that define Minnesota and Wisconsin winters.
When water infiltrates mortar joints and temperatures drop below freezing, that water expands by approximately 9%. This expansion creates tremendous internal pressure that literally pushes mortar apart from within. In a typical Minneapolis winter, this freeze-thaw cycle can occur dozens of times, with each cycle causing incremental damage that compounds over years.
“Water is the enemy of masonry. When it gets into mortar joints and freezes, it expands with enormous force. That expansion doesn’t just crack the mortar—it can push bricks out of alignment and create pathways for even more water infiltration. It becomes a self-accelerating problem if you don’t address the root cause.”
Beyond Freeze-Thaw: Other Failure Mechanisms
While freeze-thaw cycling is the dominant deterioration mechanism in our region, several other factors contribute to mortar failure:
Building Movement: All structures experience movement from thermal expansion, settlement, and wind loading. Mortar joints are designed to accommodate this movement, but over time, repeated stress causes fatigue and cracking. This is particularly evident in tall commercial buildings where wind loads are significant.
Chemical Deterioration: Exposure to airborne pollutants, acid rain, and de-icing salts can chemically attack mortar, breaking down the binding compounds. Buildings near highways or in industrial areas often show accelerated deterioration patterns.
Improper Original Installation: Mortar that wasn’t properly mixed, tooled, or cured during original construction will fail prematurely. We often see this in buildings from certain construction eras where quality control was inconsistent.
Incompatible Repairs: Perhaps the most frustrating cause of premature failure is previous repairs done with the wrong mortar type. Using modern, high-strength mortar on historic buildings with soft brick creates a harder-than-brick mortar that forces stress into the masonry units themselves—causing spalling and cracking of the brick rather than the mortar.
Understanding these failure mechanisms isn’t just academic—it’s essential for developing an effective repair strategy. At RSI, we don’t just fill joints with mortar. We diagnose the underlying causes of deterioration and develop comprehensive repair approaches that address root causes, not just symptoms.
Warning Signs Your Building Needs Tuckpointing
Early detection of mortar deterioration can prevent costly emergency repairs. Here are the key indicators that your commercial building needs professional assessment.
Crumbling or Missing Mortar
Mortar that crumbles when touched or visible gaps between bricks indicate advanced deterioration. This exposes the wall core to water infiltration and accelerated damage.
Visible Cracks in Joints
Horizontal or vertical cracks through mortar joints are pathways for water entry. Even hairline cracks allow moisture to penetrate and cause freeze-thaw damage.
Water Staining or Efflorescence
White salt deposits (efflorescence) or dark water stains on masonry indicate moisture is moving through the wall system—often entering through compromised mortar joints.
Spalling or Cracked Bricks
When brick faces flake off or crack, it often indicates trapped moisture or incompatible mortar that’s harder than the brick—forcing stress into the masonry units.
Interior Water Intrusion
Water appearing inside the building—especially on exterior walls during rain—often traces back to failed mortar joints or deteriorated masonry systems.
Bulging or Displaced Walls
Walls that appear to bow outward or bricks that have shifted indicate serious structural concerns requiring immediate professional evaluation.
RSI’s Commercial Tuckpointing Process
Our approach combines time-tested craftsmanship with modern technology to deliver tuckpointing that performs for decades—not just years.
Comprehensive Facade Assessment
Every project begins with a detailed inspection to document deterioration patterns, identify underlying causes, and develop a prioritized repair scope. We don’t just look at where mortar is failing—we analyze why it’s failing to prevent recurrence.
Mortar Analysis & Selection
We analyze existing mortar composition to select compatible replacement mortars. For historic buildings, this often means using lime-based mortars that match original specifications. Using the wrong mortar type is one of the most common—and costly—mistakes in tuckpointing.
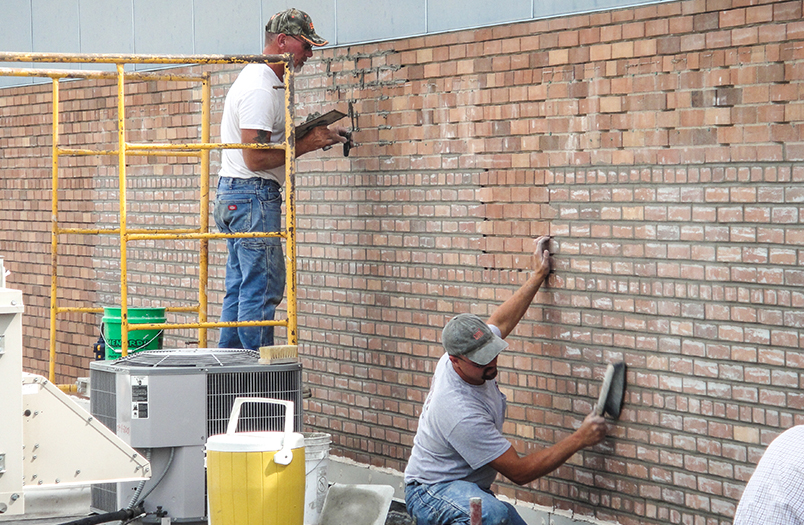
Proper Joint Preparation
Old mortar is carefully removed using hand tools or controlled mechanical methods to achieve proper depth without damaging surrounding masonry. This preparation step is where quality contractors distinguish themselves from those who cut corners.
Expert Mortar Application
Fresh mortar is applied in multiple layers, allowing proper curing between applications. Joints are tooled to match existing profiles and compacted to ensure maximum density and weather resistance.
The 2x Depth Rule: Why Proper Preparation Matters
For tuckpointing to last, mortar must be removed to a depth of at least two times the joint width. For a standard 3/8″ joint, that means removing mortar to at least 3/4″ depth. This creates sufficient surface area for the new mortar to bond properly. Many contractors skip this critical step, applying new mortar over a thin layer of deteriorated material. The result? The repair fails within a few years because there’s simply not enough bonding surface for the new mortar to adhere. Learn more about evaluating tuckpointing contractors in our Minneapolis contractor guide.
“The depth of mortar removal is the single most important factor in tuckpointing longevity. You need at least two times the joint width in depth to get a proper mechanical bond. Anything less and you’re just putting a band-aid on the problem—it might look good for a year or two, but it won’t hold up over time. We see buildings all the time where a previous contractor just skimmed over the surface. Those repairs fail within five years, and the owner ends up paying twice.”
Understanding Mortar Types for Commercial Tuckpointing
Selecting the correct mortar type is critical to tuckpointing success. The right mortar must be compatible with existing masonry, appropriate for the application, and suited to environmental conditions. Read our complete mortar selection guide for detailed specifications.
| Mortar Type | Compressive Strength | Best Applications | Key Characteristics |
|---|---|---|---|
| Type O Historic | 350 PSI | Historic buildings with soft brick (Chaska brick), limestone structures, interior non-load-bearing walls | Lime-based, highly flexible, allows moisture vapor transmission. Essential for preserving soft historic masonry—prevents brick spalling by remaining softer than surrounding units. |
| Type N Versatile | 750 PSI | Above-grade exterior walls, general tuckpointing applications, most commercial buildings built after 1920 | Balanced strength and flexibility. The most commonly specified mortar for commercial tuckpointing projects. Good freeze-thaw resistance and workability. |
| Type S Structural | 1,800 PSI | Load-bearing walls, below-grade applications, retaining walls, areas requiring high lateral strength | High strength for structural applications. Not appropriate for most historic buildings or soft brick—can cause masonry damage if misapplied. |
Important: Mortar should always be softer than the surrounding masonry units. This allows the mortar to absorb stress and serve as the sacrificial element in the wall system. Using mortar that’s too hard (a common mistake) forces stress into the brick, causing spalling and cracking. For cost considerations and detailed specifications, consult with a qualified masonry professional.
Regional Expertise: Minneapolis, Minnesota & Beyond
RSI has built a reputation as the Midwest’s leading commercial tuckpointing contractor through decades of experience with the unique challenges our regional climate and building stock present. From Minneapolis commercial buildings to historic structures throughout Minnesota and Wisconsin, we understand what it takes to make tuckpointing last in our demanding climate.
Our team has particular expertise with historic Chaska brick—the soft, cream-colored brick manufactured in Chaska, Minnesota that’s found throughout the Twin Cities’ oldest buildings. This locally-produced brick requires lime-based mortars and specialized techniques that many contractors simply don’t understand.
- Historic Preservation Expertise: 20+ projects compliant with Heritage Preservation Commission guidelines
- Regional Material Knowledge: Deep experience with Chaska brick, Indiana limestone, and Upper Midwest masonry
- Climate-Tested Methods: Techniques proven to withstand 50+ annual freeze-thaw cycles
- Service Area: Minneapolis, St. Paul, Milwaukee, and throughout Minnesota, Wisconsin, and the greater Midwest
We regularly coordinate with municipal historic preservation offices, including the Minneapolis Heritage Preservation Commission, to ensure restoration work meets all applicable guidelines while achieving optimal performance.
Commercial Tuckpointing Project Gallery
From historic landmarks to modern commercial buildings, RSI delivers tuckpointing excellence across the Midwest. Explore our portfolio of successful restoration projects.
First National Bank Building
108,000 SF historic facade restoration including comprehensive tuckpointing, masonry repair, and preservation of original architectural details.
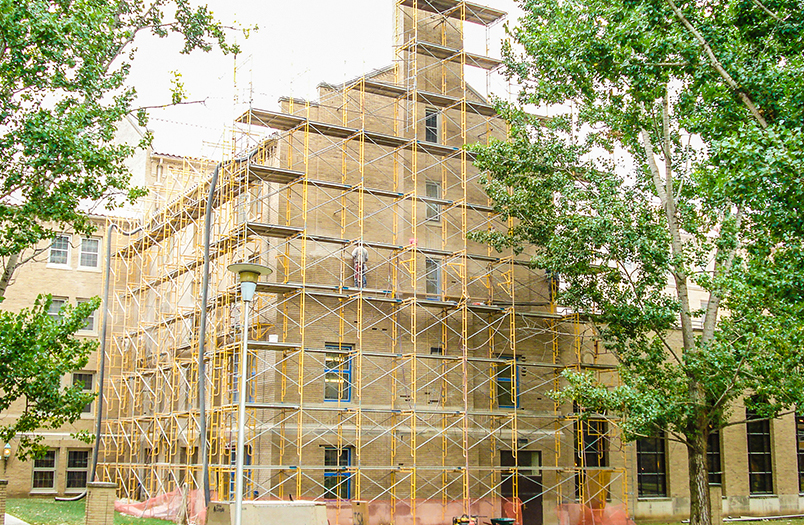
Lourdes Hall, Winona State University
56,000 SF exterior mortar removal and tuckpointing, plus 580 brick replacements and 150 Indiana limestone piece repairs.
Stone Arch Lofts
Historic preservation tuckpointing with brick replacement and concrete repairs under Minneapolis Warehouse Historic Design Guidelines.
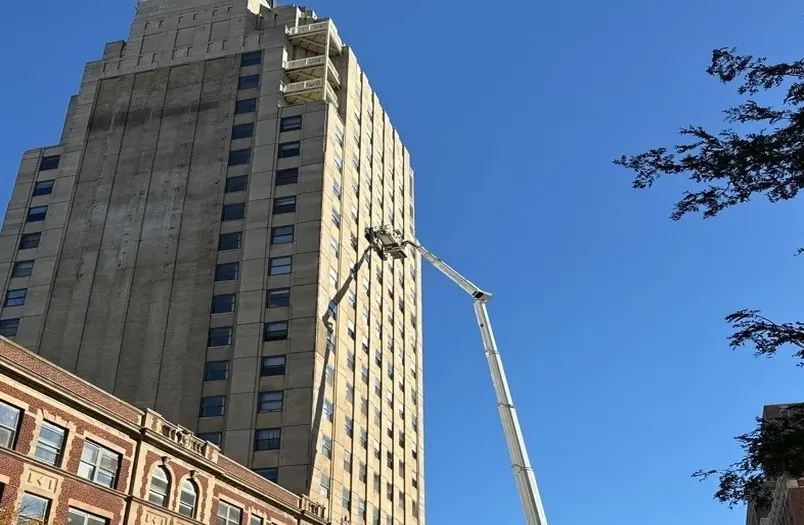
Wisconsin Tower Condominiums
35,000 SF facade area with comprehensive tuckpointing and sealant replacement on this 1930s Art Deco landmark building.
St. Cloud Community & Technical College
3,800 SF tuckpointing, 1,650 brick replacements, and 2,900 structural helical ties for comprehensive wall stabilization.
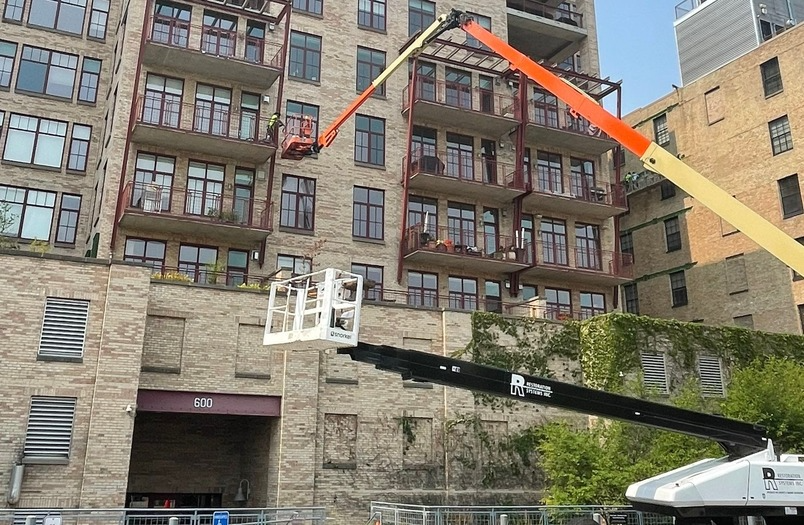
City Bella Building
47,000+ LF sealant replacement, exterior facade tuckpointing, and brick replacement under multi-year restoration contract.
The Difference Between Good Tuckpointing and Bad Tuckpointing
Not all tuckpointing is created equal. The difference between quality work and substandard work may not be visible immediately—but it becomes painfully apparent within a few years. Understanding what separates professional restoration from corner-cutting is essential for property managers making contractor decisions.
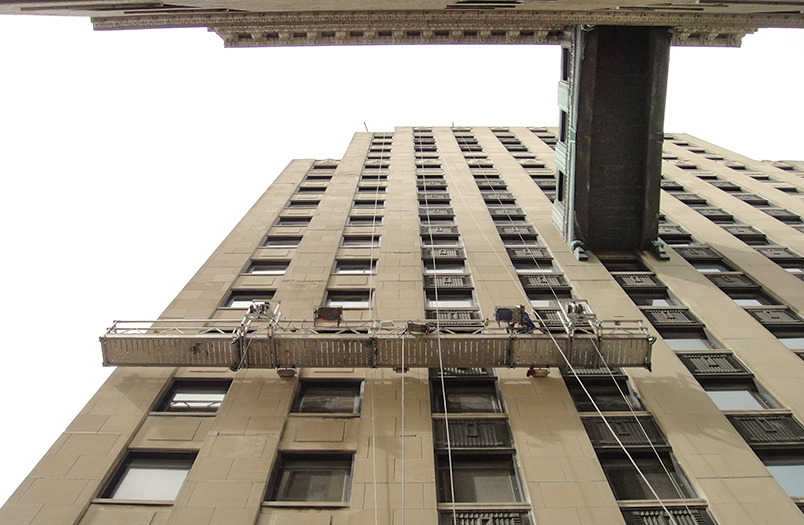
The Loose Wiles Building
RSI was called to assess the Loose Wiles Building after the property manager noticed continuing deterioration despite recent “repairs.” What we found was shocking: a previous contractor had installed safety netting around portions of the building to catch falling masonry—rather than actually fixing the underlying problems. The netting was a band-aid solution that addressed liability concerns while doing nothing to prevent further deterioration. The building owner had paid for “repairs” that were nothing more than cosmetic cover-ups of serious structural issues. When we performed a proper assessment, we identified root causes including water infiltration from failed flashings, incompatible mortar from earlier repairs, and structural movement that had never been addressed. The true cost of the inadequate work? The owner ultimately paid significantly more for proper repairs than they would have if the job had been done correctly the first time.
This story illustrates a critical point: the cheapest bid is rarely the most economical choice when it comes to masonry restoration. Improper repairs accelerate deterioration, create liability, and often void warranties on related building systems.
Evaluating Tuckpointing Quality
Red Flags: Poor Quality Work
- Mortar applied over deteriorated joints (skimming)
- Shallow mortar removal (less than 2x joint width)
- Mismatched mortar color or texture
- Mortar smeared on brick faces
- No discussion of mortar type or compatibility
- Failure to address water infiltration sources
- Band-aid solutions instead of root cause fixes
Hallmarks: Quality Work
- Complete removal of deteriorated mortar to proper depth
- Mortar analysis and compatibility assessment
- Clean, consistent joint profiles throughout
- Brick faces clean of mortar residue
- Documentation of scope, materials, and methods
- Root cause analysis before repair specification
- Comprehensive approach to building envelope
“We see it all the time—buildings where someone skimmed mortar over the surface without proper preparation. It might look okay for a year, but then it starts failing because there’s no mechanical bond. The new mortar just peels off. The owner ends up paying twice: once for the bad work and again for us to do it right. That’s why we’re so insistent on proper preparation. The 2x depth rule isn’t just a suggestion—it’s the difference between a repair that lasts 25 years and one that fails in 5.”
When evaluating tuckpointing contractors, ask specific questions: How deep will you remove old mortar? What mortar type will you use and why? How will you address any underlying water infiltration issues? A quality contractor will have detailed, technical answers—not vague assurances. Read our complete guide to evaluating Minneapolis tuckpointing contractors for more detailed evaluation criteria.
Frequently Asked Questions About Commercial Tuckpointing
Ready to Start Your Restoration Project?
Contact us today for a free on-site assessment. Our team will evaluate your building’s needs and provide a detailed proposal with no obligation.