 60,000 LF
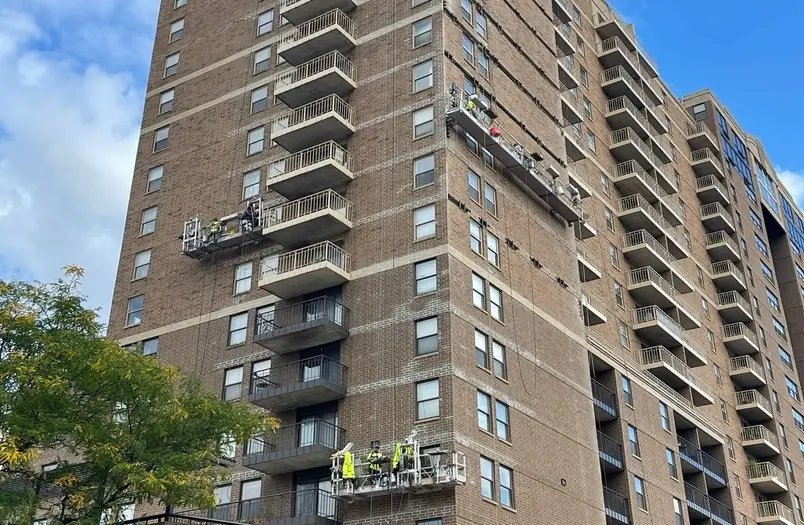
RiverWest Building
Minneapolis, MN
Complete sealant replacement at 60,000 linear feet of windows and doors, plus 11,650 LF thru-wall flashing and 30,000 SF waterproofing membrane at balconies.
Heritage Preservation Commission ComplianceMost building leaks don’t start where you see the water—they start at joints, transitions, and openings where building elements meet. RSI’s diagnostic approach identifies the true source and delivers lasting repairs.
Understanding why sealant joints fail helps you identify problems early and avoid costly repairs. Each failure mode requires a different diagnostic approach and repair strategy.
Sealant needs to bond only to the two opposing sides of a joint to flex properly. When sealant adheres to the back of the joint (the third side), it can’t stretch—it tears. This common installation error creates premature failure even with quality products.
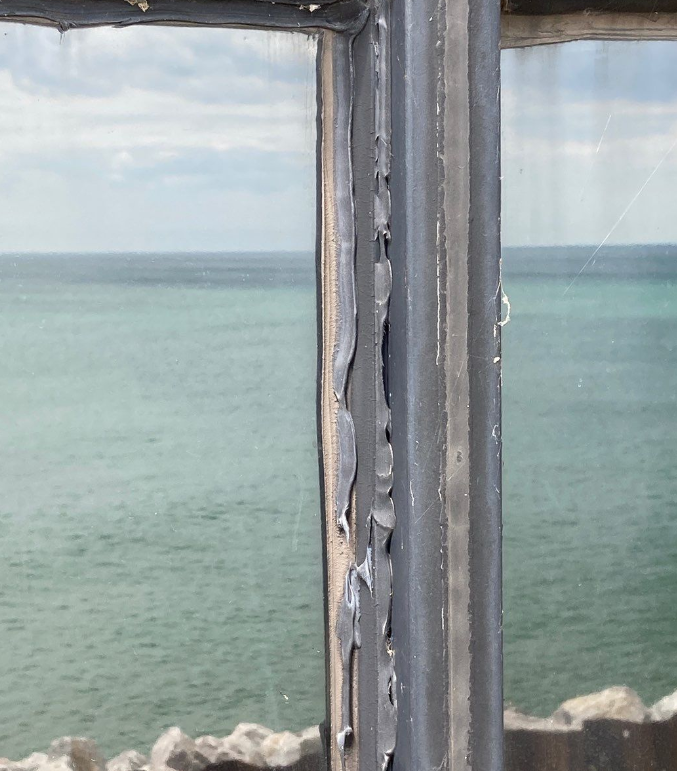
Sealant bonds are only as strong as the surface preparation allows. Dust, debris, moisture, or incompatible substrates prevent proper adhesion. When the bond fails, the sealant peels away from the joint edges, creating gaps that admit water.
Different sealant chemistries perform differently under stress. When the wrong product is specified for a joint’s movement requirements or exposure conditions, the sealant itself cracks and splits—even if the adhesion remains intact.
Most commercial sealants have specific application temperature ranges. Installing sealant in cold weather can prevent proper curing, while hot temperatures can cause skinning before the joint is properly tooled. Both scenarios compromise long-term performance.
Certain sealant chemistries react negatively with specific substrates, coatings, or adjacent materials. Silicone on uncured silicone, incompatible primers, or contact with bituminous materials can cause chemical degradation and early failure.
Every sealant has a rated movement capacity—typically expressed as a percentage of joint width. When thermal expansion, building settlement, or structural movement exceeds this capacity, even properly installed sealant will eventually fail.
Not all caulk is created equal. The products you find at home improvement stores are designed for residential applications with minimal movement and limited exposure. Commercial buildings demand materials engineered for significantly greater performance.
“When someone tells me they used ‘water-resistant caulk’ on their building, I know we’re dealing with a consumer-grade product. Those products might work fine around a bathtub, but they’re not designed for the stresses a commercial building envelope experiences. Movement capacity, UV stability, substrate compatibility—commercial sealants are engineered to completely different standards.”— Dan Lephardt, Branch Manager, Wisconsin, RSI
| Performance Factor | Consumer Grade | Commercial Grade |
|---|---|---|
| Movement Capacity | ±5% to ±7.5% | ±25% to ±50% |
| UV Resistance | Limited; degrades in 2-3 years | Engineered for full exposure; 10+ years |
| Testing Standards | Minimal or proprietary testing | ASTM C920 certified performance |
| Expected Lifespan | 2-5 years | 10-20+ years |
| Warranty Backing | Limited; cosmetic only | Manufacturer warranties up to 20 years |
| Substrate Compatibility | General purpose; limited adhesion | Engineered for specific substrates; primer systems available |
| Joint Geometry Requirements | Minimal guidance | Specific width-to-depth ratios required |
| Application Training | DIY instructions | Professional certification programs |
The Midwest presents unique challenges for building envelope sealants. Annual temperature swings of 120°F or more—from -20°F winter lows to 100°F summer highs—create constant thermal cycling that tests every joint in your building.
Minnesota and Wisconsin experience 50–100+ freeze-thaw cycles annually. Water that penetrates a failing sealant joint freezes and expands, accelerating deterioration of both the sealant and surrounding substrates.
A 100-foot precast panel can expand and contract nearly half an inch seasonally. Joints must accommodate this movement year after year without losing adhesion or cohesion.
Buildings along Lake Michigan and Lake Superior face additional challenges: wind-driven rain and higher humidity levels that accelerate deterioration of marginal sealant installations.
Optimal sealant application requires temperatures between 40°F and 100°F. This creates a compressed installation window in the Midwest, making project scheduling and phasing critical.
“We often recommend phased repair programs for larger buildings. This allows us to prioritize the most critical joints—typically south and west exposures that see the greatest thermal stress—while scheduling remaining work across multiple seasons. It’s a more strategic approach than trying to rush everything into a single weather window.”— Dan Lephardt, Branch Manager, Wisconsin, RSI
The difference between a repair that lasts and one that fails within months often comes down to diagnosis. Many contractors focus on visible symptoms—they see cracked sealant and replace it. RSI takes a systems approach, tracing water pathways back to their origin and evaluating the entire joint system before recommending repairs.
Water infiltration rarely results from a single failure point. A leak at an interior wall may originate from failed window sealant, but the pathway might include compromised flashing, deteriorated backup waterproofing, or failed through-wall connections. RSI’s diagnostic process examines the complete assembly, ensuring repairs address root causes rather than just symptoms. This approach costs slightly more upfront but dramatically reduces the likelihood of repeat service calls and ongoing water damage.
From initial assessment through final documentation, every RSI sealant project follows a proven methodology.
Comprehensive field evaluation including adhesion testing, joint measurement, substrate analysis, and water pathway mapping. We identify not just what’s failing, but why.
Based on assessment findings, we specify sealants matched to your building’s substrates, movement requirements, and exposure conditions. No one-size-fits-all solutions.
Complete removal of failed sealant, proper joint preparation, backer rod installation, primer application where required, and sealant installation with professional tooling.
Detailed records of products used, locations addressed, and conditions encountered. This documentation supports warranty claims and informs future maintenance planning.
Expansion joints are engineered to move—that’s their entire purpose. They accommodate thermal expansion and contraction, building settlement, and seismic movement. Yet they’re frequently “repaired” with rigid materials that guarantee future failure.
When a building’s expansion joints are filled with mortar, rigid sealant, or other inflexible materials, the joint can no longer perform its intended function. The movement doesn’t stop; it simply transfers stress to adjacent assemblies, often causing cracking in walls, windows, or structural connections.
Effective expansion joint repair starts with understanding the joint’s required movement capacity. We analyze the joint width, the materials on either side, and the expected thermal and structural movement to specify appropriate repair systems.
“Every expansion joint is part of a specific building assembly, and the repair has to account for that context. A joint at a curtain wall mullion has different requirements than one at a precast panel. A parking deck expansion joint sees traffic loads that a wall joint never will. We don’t have a standard solution—we have a methodology for determining the right solution.”— Dan Lephardt, Branch Manager, Wisconsin, RSI
From historic landmarks to modern high-rises, RSI delivers precision sealant replacement across the Midwest. Each project demonstrates our commitment to diagnostic accuracy and lasting results.
60,000 LF
Minneapolis, MN
Complete sealant replacement at 60,000 linear feet of windows and doors, plus 11,650 LF thru-wall flashing and 30,000 SF waterproofing membrane at balconies.
Heritage Preservation Commission Compliance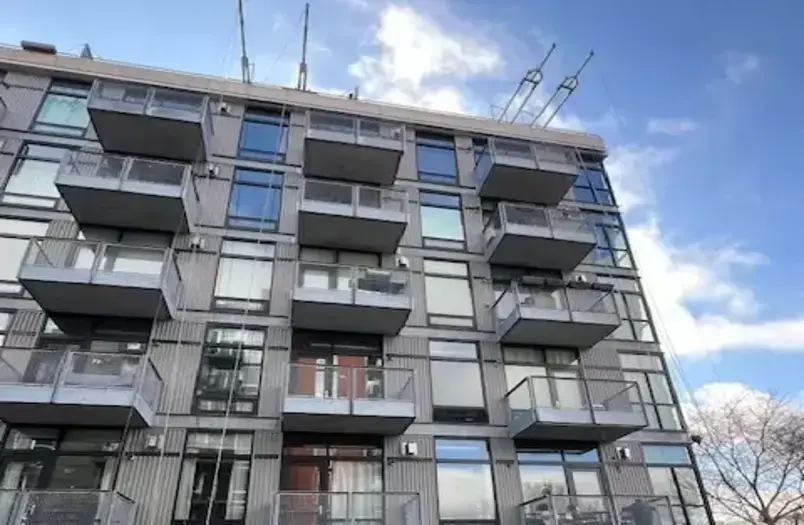 Specialty Rigging
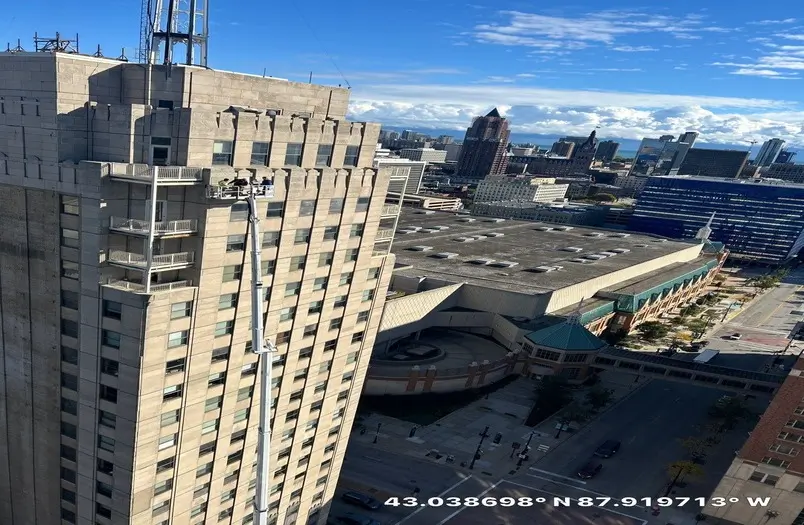
Minneapolis, MN
Dedicated sealant-only project requiring innovative swing stage and rigging solutions to access complex facade geometry.
Golden Gate Rigging Expertise 5-Year Contract
Minneapolis, MN
Multi-year facade maintenance program for twin towers—20 and 40 stories—including comprehensive sealant replacement and ongoing envelope maintenance.
High-Rise Expertise
35,000 SF
Milwaukee, WI
Sealant replacement integrated with comprehensive 35,000 SF facade restoration on this historic Art Deco landmark building.
Historic Preservation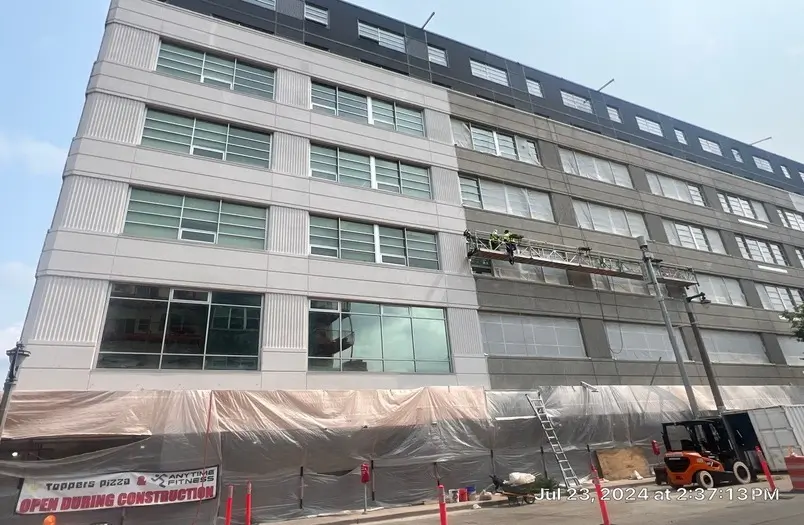 30,000 SF
Milwaukee, WI
Complete sealant replacement following 30,000 SF coating removal, restoring envelope integrity and preparing surfaces for new protective systems.
Coating Removal & Sealant 108,000 SF
St. Paul, MN
Exterior sealant replacement at spandrel panel locations as part of comprehensive facade restoration including 108,000 SF of tuckpointing.
Comprehensive Facade RestorationNot all sealant contractors approach the work the same way. These questions help you evaluate whether a proposed repair will address root causes or just cover up symptoms temporarily.
A contractor who can’t explain why existing sealant failed will likely repeat the same mistakes. Look for specific answers about adhesion loss, wrong product selection, improper installation, or movement beyond capacity.
Applying new sealant over failed material is a common shortcut that guarantees early failure. Proper repairs require complete removal of existing sealant, cleaning of joint surfaces, and fresh substrate preparation.
The answer should reference your building’s specific substrates, the joint’s movement requirements, and exposure conditions. Generic answers like “commercial grade caulk” suggest a one-size-fits-all approach.
Sealant performance depends on correct width-to-depth ratios. Ask about backer rod sizing and installation. Contractors who skip this step are creating joints that will fail prematurely.
Professional contractors understand application temperature limits and plan accordingly. Vague answers or willingness to work in any conditions suggests potential quality compromises.
Quality contractors document products used, locations addressed, and any conditions encountered. This information is valuable for warranty claims and future maintenance planning.
Common questions about commercial sealant replacement, answered by RSI’s building envelope specialists.
Commercial-grade sealants typically last 10-20 years depending on exposure conditions, product quality, and installation. However, south and west-facing elevations often require attention sooner due to increased UV exposure and thermal stress. RSI recommends professional inspection every 3-5 years to identify deterioration before water infiltration occurs. Buildings with heavy expansion joint movement or those in harsh lakefront environments may need more frequent evaluation.
While the terms are often used interchangeably, “caulk” typically refers to consumer-grade products with limited movement capacity (±5-7.5%), while “sealant” usually describes commercial-grade products engineered for higher movement (±25-50%) and longer service life. Commercial sealants are formulated with specific chemistries (silicone, polyurethane, polysulfide) for different substrates and exposures, and are tested to ASTM standards. For commercial buildings, always specify a proper building envelope sealant rather than general-purpose caulk.
Sealant can fail at the bond line—where it contacts the substrate—while still appearing intact on the surface. This adhesion failure creates gaps that aren’t visible but allow water infiltration. Other causes include failed weep systems in the window frame, compromised flashing at the head or sill, or water entering through adjacent assemblies and traveling horizontally before appearing inside. Proper diagnosis requires examining the complete window-to-wall interface, not just visible sealant.
Most commercial sealants require application temperatures between 40°F and 100°F for proper curing. Cold temperatures slow or prevent curing, while frozen moisture on substrates prevents proper adhesion. Some specialized products allow lower-temperature application, but performance may be compromised. In the Midwest, RSI typically schedules sealant work for spring through fall, with critical repairs prioritized during optimal weather windows. For emergency winter repairs, substrate warming and low-temperature products may be options.
Quality commercial sealants properly specified and installed can last 15-20+ years. Key factors affecting longevity include: product selection matched to substrates and movement requirements, proper joint geometry (width-to-depth ratios), thorough surface preparation and priming where required, installation within temperature limits, and UV exposure levels. Manufacturer warranties typically range from 10-20 years. Consumer-grade products rarely last more than 2-5 years in commercial applications.
Visible signs include cracking (cohesion failure), peeling away from joint edges (adhesion failure), hardening and brittleness, discoloration or chalking, and visible gaps between the sealant and substrate. Less obvious indicators include interior water staining that appears after rain or snow melt, musty odors suggesting hidden moisture, and increased heating/cooling costs from air infiltration. If your building is 10+ years old with original sealant, professional inspection is recommended even without visible problems.
Yes—complete removal of failed sealant is essential for lasting repairs. New sealant cannot bond properly to deteriorated material, and layering creates irregular joint geometry that promotes premature failure. RSI’s process includes mechanical removal of all existing sealant, cleaning of joint surfaces to remove residue and contaminants, inspection of substrates for damage, and proper preparation before new sealant application. Contractors who apply over existing material are creating repairs that will fail quickly.
Expansion joints require sealants with high movement capacity—typically ±50% or greater. Silicone sealants are often preferred for their excellent movement capabilities and UV resistance. For joints with very high movement or traffic exposure, pre-formed expansion joint systems or hybrid approaches combining sealants with compression seals may be more appropriate. Fire-rated assemblies are required where joints penetrate fire barriers. RSI evaluates each joint’s specific requirements—movement, substrates, exposure, traffic—before recommending appropriate materials.
Costs vary significantly based on joint accessibility (ground-level vs. high-rise requiring swing stages), total linear footage, substrate conditions, product requirements, and project timing. Simple ground-level work may cost $8-15 per linear foot installed, while high-rise work with difficult access can exceed $25-40 per linear foot. RSI provides detailed assessments and transparent pricing after evaluating your specific building conditions. The investment in quality sealant replacement typically pays for itself by preventing water damage, reducing energy costs, and extending building envelope life.
Silicone sealants offer superior UV resistance, excellent movement capacity (±50%), and very long service life. They’re ideal for exposed joints and glass-to-metal applications but can’t be painted. Polyurethane sealants are paintable, offer good abrasion resistance, and work well on concrete and masonry. They typically have lower movement capacity (±25-35%) and shorter UV life. Many projects use both: silicone for exposed high-movement joints, polyurethane for locations requiring paint compatibility. RSI specifies based on each joint’s specific requirements.
RSI’s diagnostic approach identifies where water is really entering your building—not just where it appears. Our building envelope specialists trace pathways, evaluate joint systems, and deliver repairs that address root causes.
Serving Minneapolis, St. Paul, Milwaukee, and communities throughout the Midwest. View our service area